The UO’s copyrighted, campus map can be added to UO websites by adding the map url to an iframe. Website editors can easily display each campus and/or different map apps.
The main map url is https://map.uoregon.edu.
To display a specific campus, add a campus code to the end of the URL. Example: https://map.uoregon.edu/nepdx
Campus codes are:
- Eugene - /main
- NE Portland - /nepdx
- Oregon Institute of Marine Biology - /oimb
To display a map app use one of the urls below:
- Accessibility - https://map.uoregon.edu/accessibility
- Bee Campus - https://map.uoregon.edu/native-pollinators
- Food - https://map.uoregon.edu/food
- Indigenous UO - https://map.uoregon.edu/indigenous
- Mapas de la UO - https://map.uoregon.edu/spanish
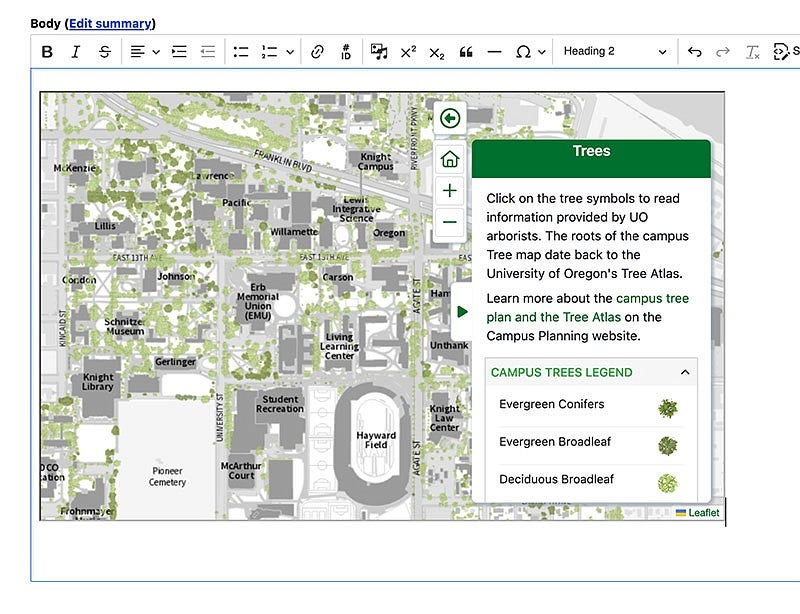
- Trees - https://map.uoregon.edu/trees
To display a map app on a specific campus, add a campus code to the end of the url. Note some apps are not currently available on all campuses. Here’s an example using the trees app for the Eugene campus: https://map.uoregon.edu/trees/main
How to add an iframe with a campus map:
1. Click the "Iframe Embed" option located in the top toolbar in the CKEditor.
2. In the URL box, paste the map URL you got from the instructions above. Example: https://map.uoregon.edu/trees/main
Tips:
To hide the search bar UI: Add ?hel=010 to the end of the url when adding in the iframe. Here’s an example using the trees app for the Eugene campus: https://map.uoregon.edu/trees/main/?hel=010
To hide both the search bar UI and the UO map UI: Add ?hel=000 to the end of the url when adding in the iframe. Here’s an example using the trees app for the Eugene campus: https://map.uoregon.edu/trees/main/?hel=000
3. Add the size you want to display your iframe. Sizing is dependent on page type, placement, and device. We recommend adjusting the height and width to meet the needs of your page and audience.
A starting place for laptop/desktop sizing on a basic page is 800 width x 500 height while many mobile devices run around 400 width x 800 height.
You can also use the same instructions found on our Video help pages to make your map embed have a responsive size instead of a fixed size.

4. Add a relevant description in the Advisory Title field, related to the content of your map. This is required so that screen readers and search engines know what the embedded iframe contains.
Here is an example of what the above iframe will look like when embedded in a Drupal content editor window:
Embedding an inside location map
You may occasionally need to embed a map showing the inside of a building. This is usually done either in tandem, or just after, showing a map with the exterior of the building so that users know how to get there.
Note, if you link to a location which requires you to be logged in to view, any embedded maps may only show the default map instead, so use this method with caution and always test your map embed while not logged into the UO Maps site.
To create a link to an inside location you would use the same methods as shown above but will be adding a additional modifiers after the existing ? in your URL.
- The first thing you will need to do is log into the Maps site using the lock menu in the upper right corner of the page.
- Then, you will find the room ID number by browsing the map until you find the room you want to use, and then click on the room.
- When you are logged in, most rooms should be listed on the map pop-up. If a room does not have an ID, you may need to click on other rooms to get the room ID format, then modify your link to match the desired room.
The final room link will end up like this:
https://map.uoregon.edu/?r=033037A&gi=true
More complex customizations are possible using the Map API documentation. Web Developers can request access to the Map API by logging in to map.uoregon.edu, selecting the cube icon, selecting View the Map API docs, and submitting the brief form.
Questions about the campus map can be emailed to the Location Innovation Lab.