A vertical list is a row of content with a photo on the left or the right of a headline, which can be linked to additional content on other webpage or websites.
Add Vertical List
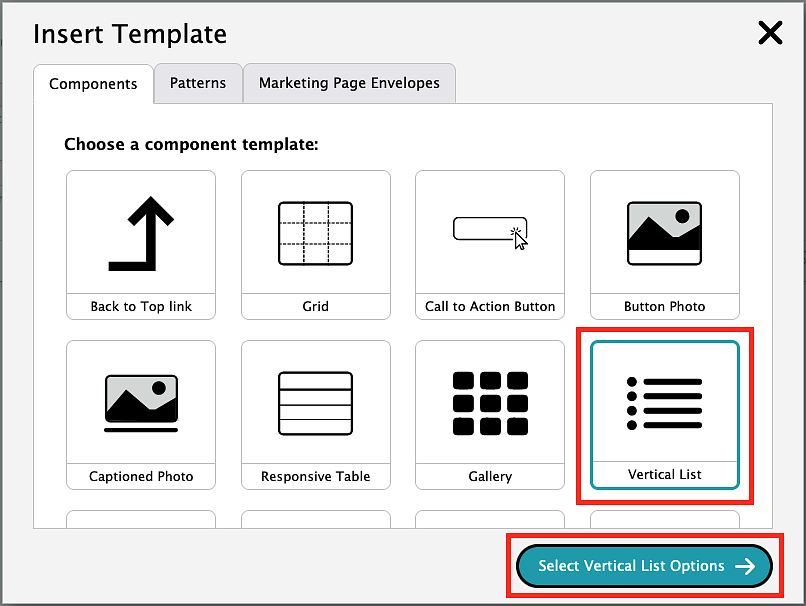
To create a vertical list, you will need to click on the template icon in the editor toolbar.
Choose the "Vertical List" option from the templates. Then, click "Select Vertical List Options."
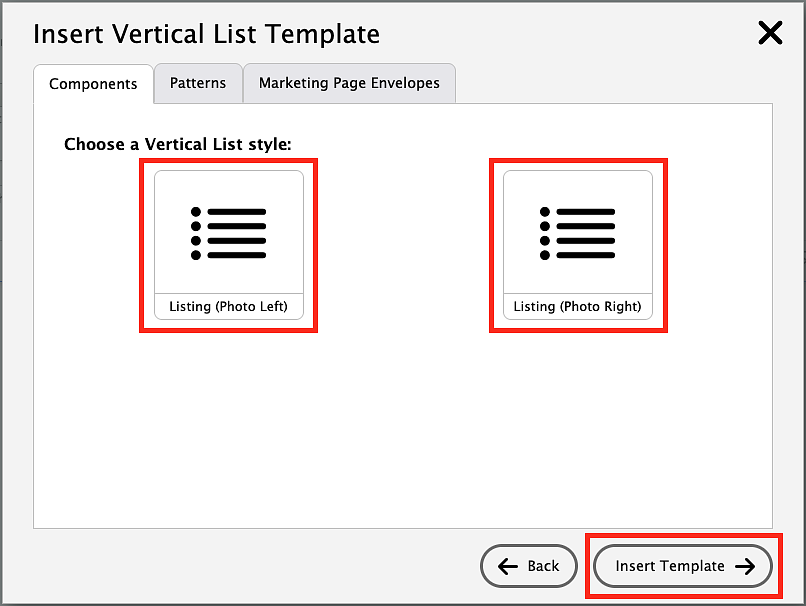
Select the vertical list style option you want (listing with the photo on the left or listing with the photo on the right). Then click the "Insert Template" button.
Highlight all of the existing "Listing Title" text and type in your new text. You can also make this a link to link to information on another page.

To add your photo, click on the placeholder image (you will know your image is selected when you see a blue line outlining the placeholder image). Click the Insert Media icon from the WYSIWYG editor bar (outlined in red in the image below). That icon will bring up the media browser popup box that you see when you add new images and will function exactly the same, except you are replacing the existing placeholder image with a new one. Follow the same steps as adding a new image and the old image will be replaced by a new one.

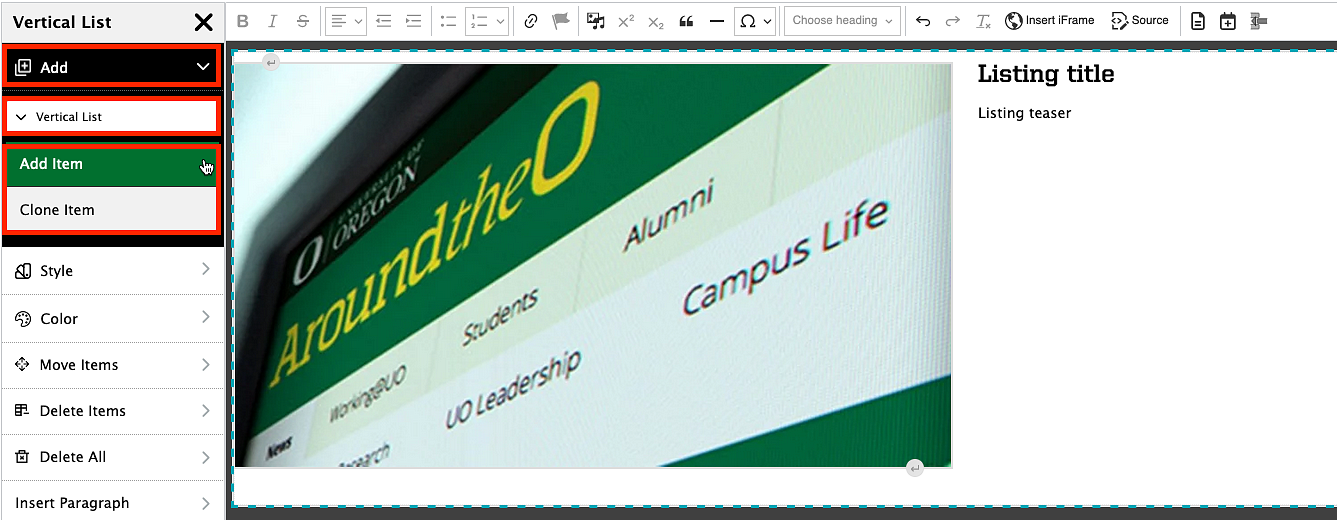
Add List Items
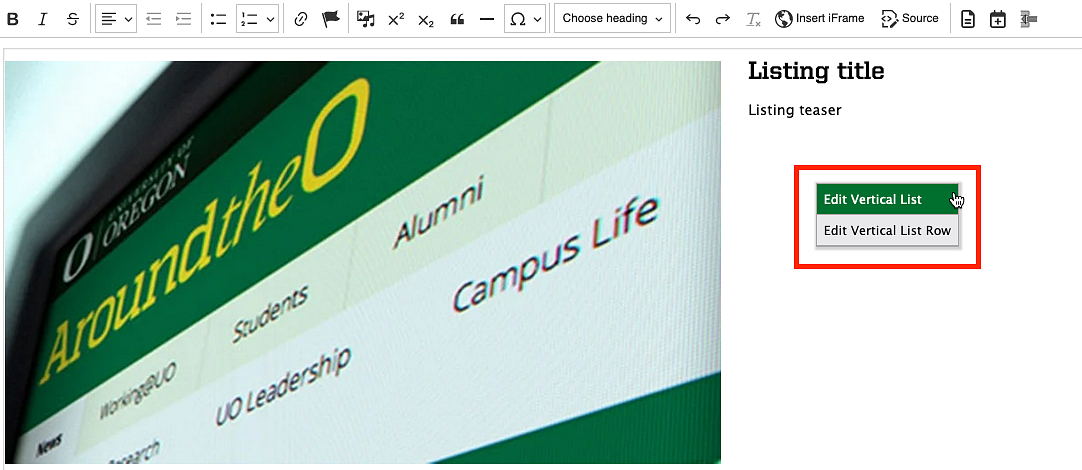
To add additional listing items, right-click below the text section of the vertical list and select "Edit Vertical List."
Select "Add," then "Vertical List." From here, you can select "Add Item" to add a brand new list item, or select "Clone Item" to clone an existing list item.
List Styles
There are two styles for lists—photo left and photo right. To change the location of the photo, right-click below the text section of the vertical list and select "Edit Vertical List."
Select "Styles," then "Vertical List" from the sidebar menu. Select "Photo Left" or "Photo Right" to change the location of the photo and text in your vertical list. Click the "X" at the top of the sidebar menu to exit out of the menu.

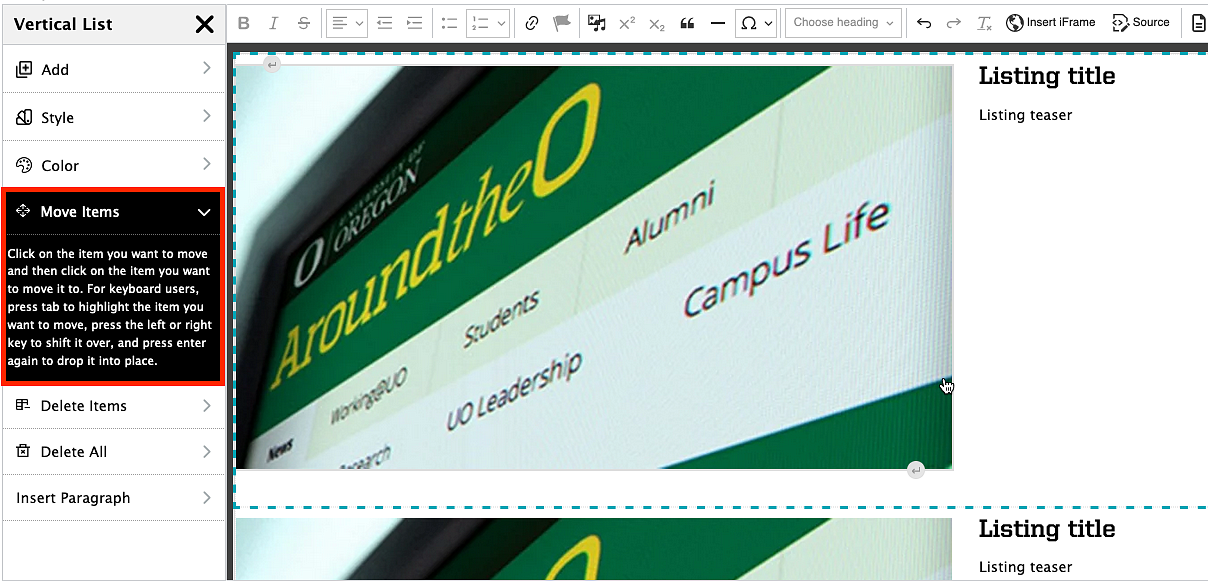
Rearrange List Items
To rearrange listing items, right-click directly below the text section of the vertical list and select "Edit Vertical List."
Select "Move Items" from the sidebar menu. Click on the item you want to move and then click on the item you want to move it to. For keyboard users, press tab to highlight the item you want to move, press the left or right key to shift it over, and press enter again to drop it into place.
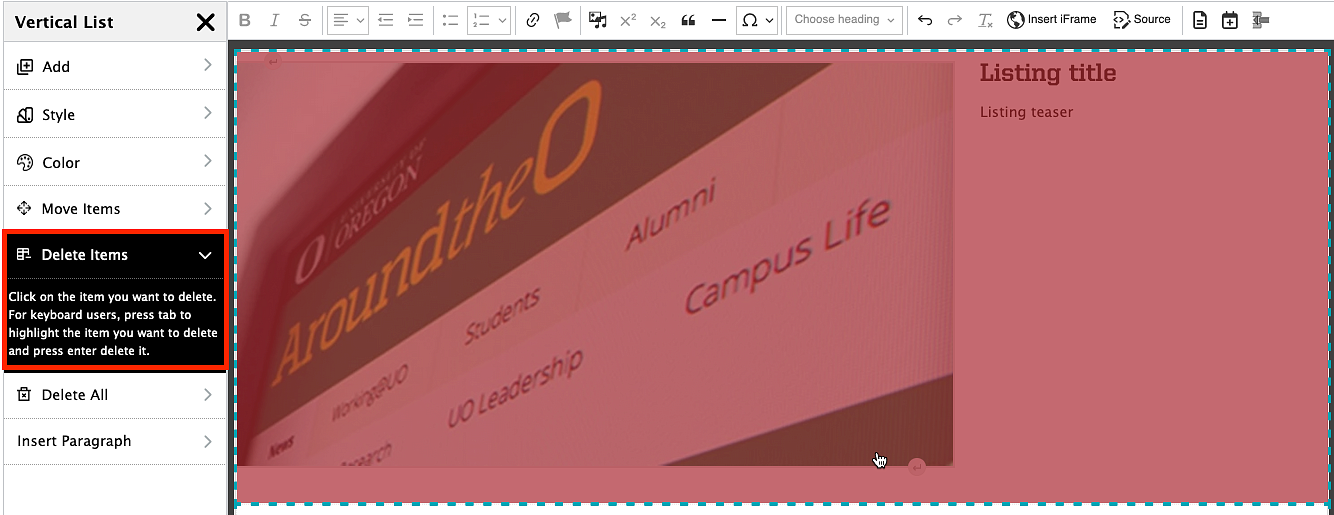
Delete List Items
To remove a listing item, right-click directly below the text section of the vertical list and select "Edit Vertical List."
From the sidebar menu, click "Delete Items." Click on the items you want to delete (the item will appear red when you hover over it). For keyboard users, press tab to highlight the item you want to delete and press enter to delete it.
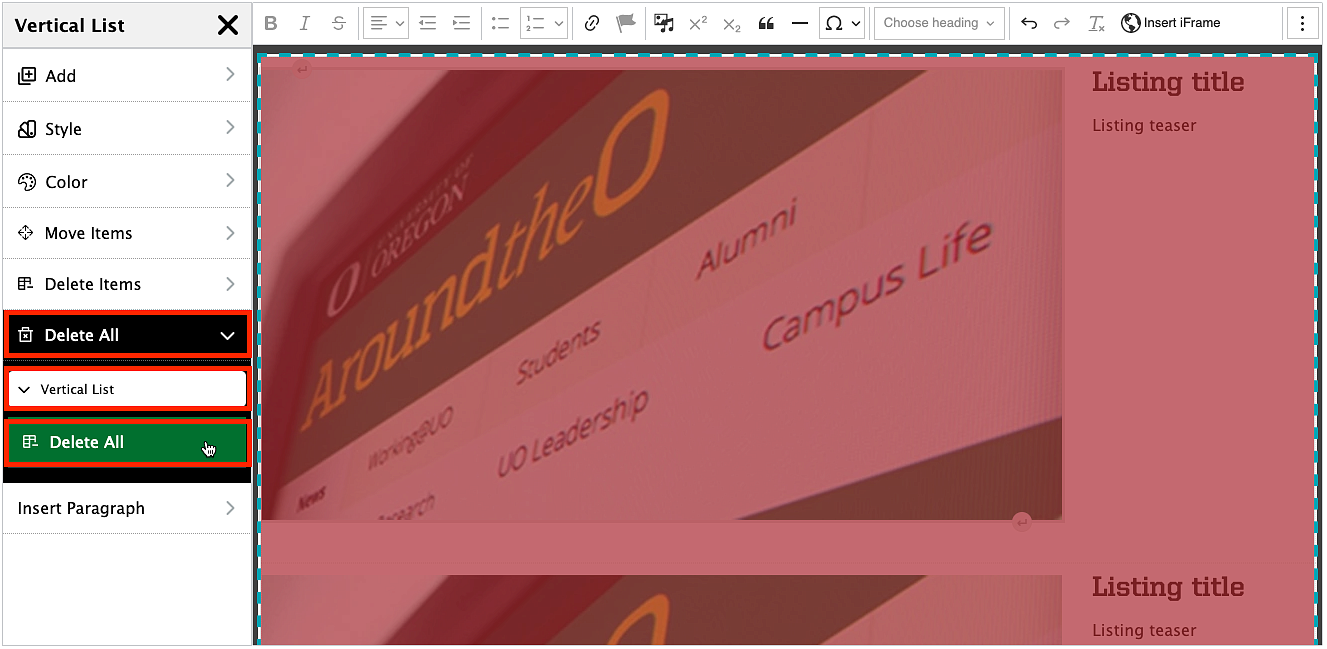
Delete List
To remove the entire list, right-click directly below the text section of the vertical list and select "Edit Vertical List."
Select "Delete All" from the sidebar menu then select "Vertical List." Click the "Delete All" button and the entire listing will be deleted.
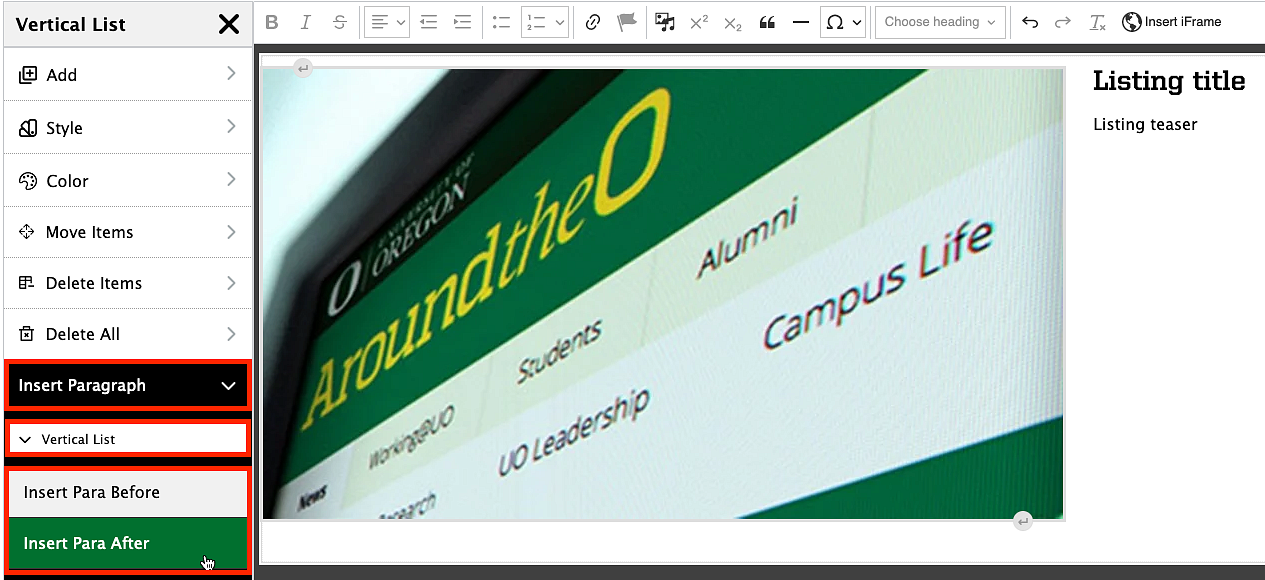
Add a Space Before or After a Vertical List
To add a space or start a new paragraph before or after your vertical list, right-click directly below the text section of the vertical list and select "Edit Vertical List."
From the sidebar menu, click the "Insert Paragraph" option then click "Vertical List." Click "Insert Para Before" if you want to insert a space or new paragraph above the vertical list. Click "Insert Para After" if you want to insert a space or new paragraph below the vertical list.