Visit the Photo Tools page for information about:
- How to prepare/optimize images before uploading to your website
- Image file sizes
- Image crop sizes
- Image naming conventions
Add New Images
Add an Image to a Page
Click your page where the image should go and then click the Media Library button in the center of the editor that looks like this:

You will now see the Media Library window:
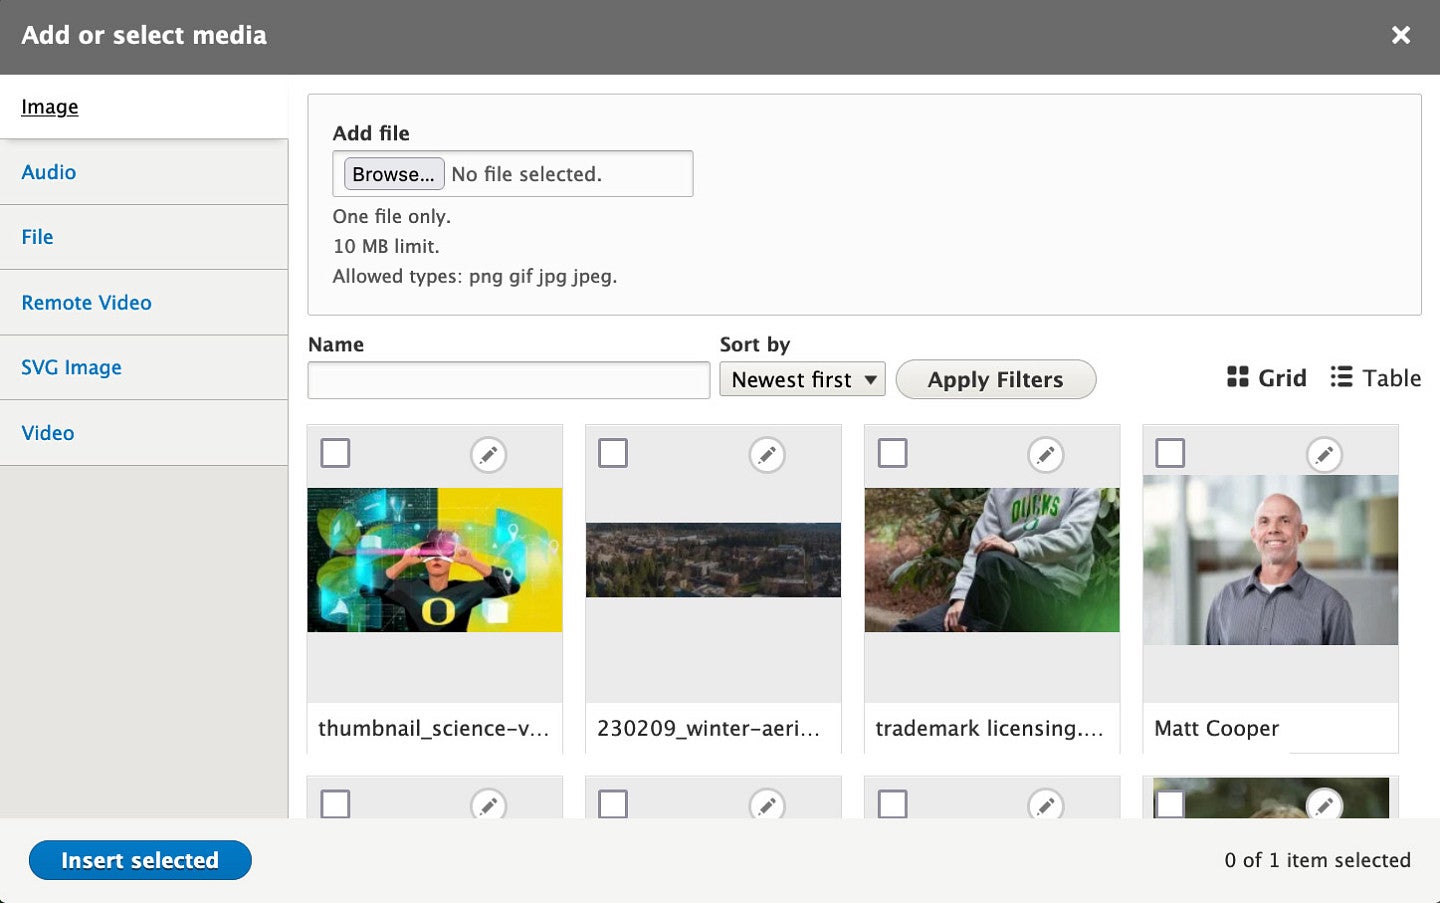
- Click the "Browse" button, then browse your computer until you find the image you want to upload.
- Add the Alt Text for that image in the Alternative text field.
- Click the "Save and Insert" button to insert your image where your cursor was.
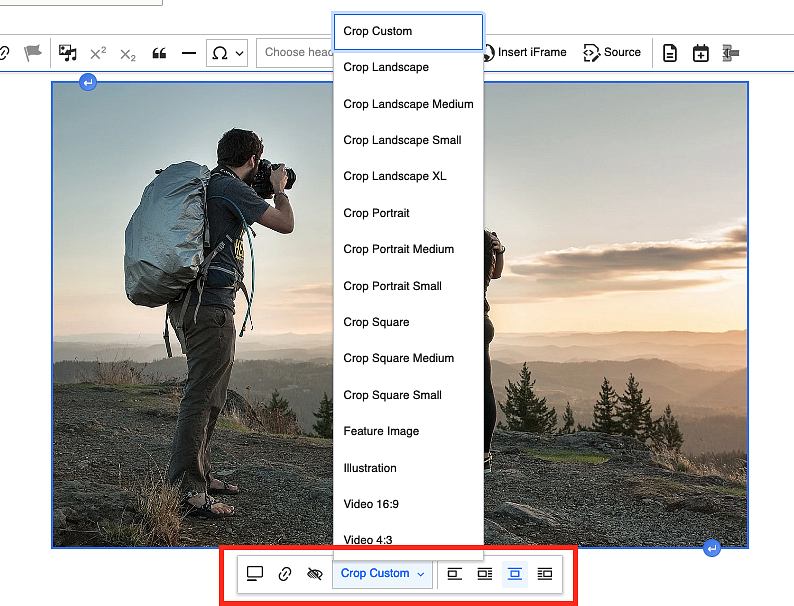
- To change the alignment of your photo, click on it to select it and select one of the alignment options on the right side of the dialog box that appears above or below the image. The Left or Right alignment have the text wrap around the image, while the Centered option does not have text wrap around the image. "Center" is the default setting but can be changed at any time by clicking the image and selecting a different alignment from the pop up dialog box.
- You can also select a crop ratio and size. Crop Custom is the original ratio and size the image was when uploaded.
Add an Image to the Library
Note: If you need to add more than 5 images, it could be easier to add them all at once. See Upload Multiple Images for more information.
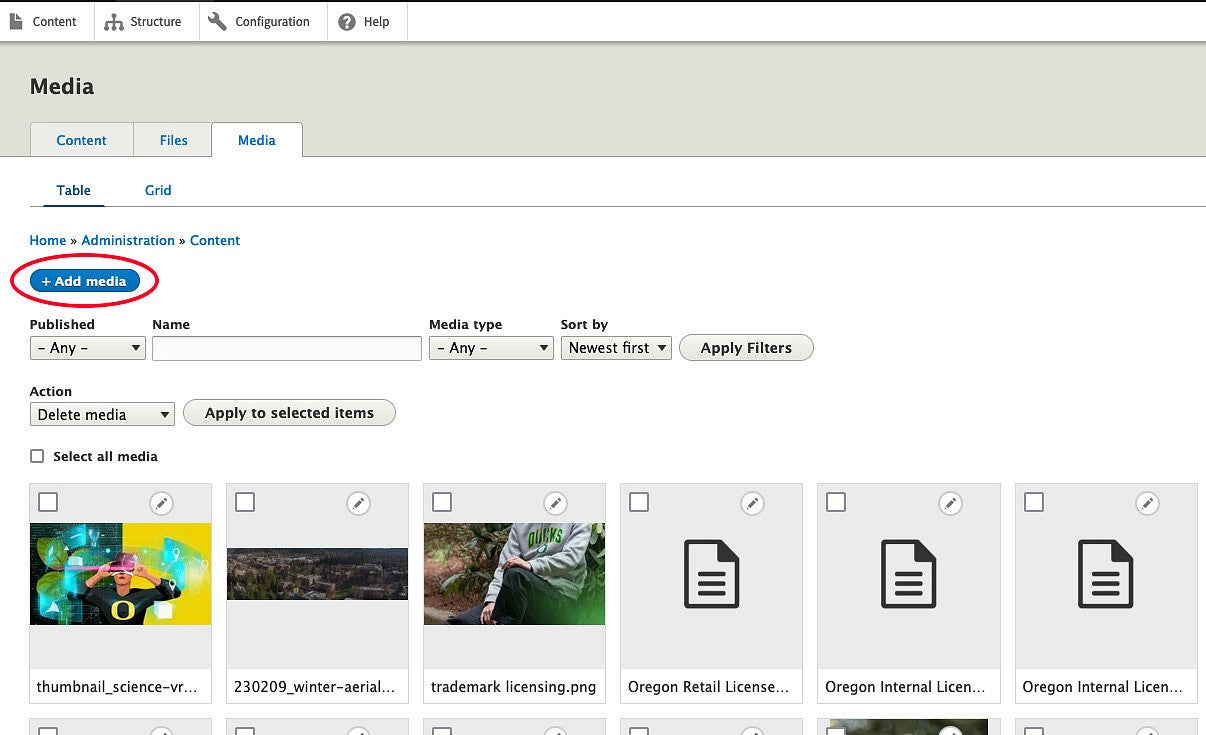
- Click on Content and then click the Media tab.
Click on the + Add media button at the top left of the page.
- This will give you the same screen that appears in the pop-up box when you are adding a photo while creating a page.
Accessibility in Practice
All images must have "Alternative (or Alt) Text" for website accessibility and search engine optimization.
Alternative Text should have a clear and concise description of the images or graphics appearing on your site and will be a description of the image to someone who can't see the photo.
This text can be specific, such as "Professor Plum in the EMU ballroom with GTFs John Smith and Jane Doe" or a generic "Professor Plum with students".
"Comment out" (for the screen reader) strictly decorative graphics with alt = "". Use a testing tool to view images replaced with their alt text.
For additional information on Alternative Text, see the W3.org's "An alt text Decision Tree" tutorial page.
Add Previously Uploaded Images
- To insert an image previously uploaded to your library, click your cursor where you want to insert your image.
Adding Existing Images in Drupal 8/9+
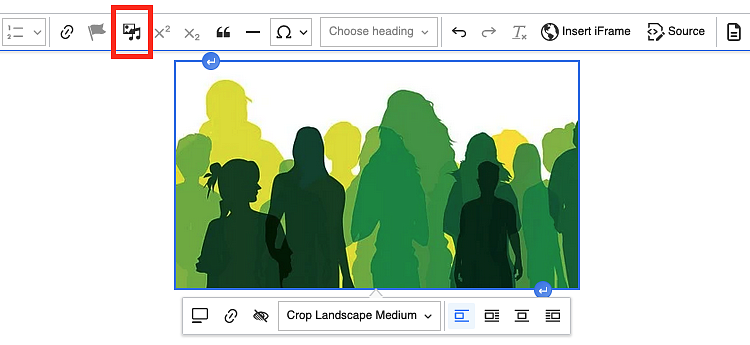
- Click the Media Library button in the editor:
Browse your library until you find the image you wish to insert and click on it, then click the "Insert selected" button at the bottom:
Note: If the same image appears 20 times or more on a page, it could stop rendering and may not appear. This can occur when the same image is being used as a placeholder in multiple areas on the page. If this happens, try using different images as placeholders.
Replace an Image
Replace an Image in the Editor
Click on the existing image and click the insert media icon in the WYSIWYG editor to select or upload a new image and follow the steps described in the sections above.
Replacing an Image Globally from the Files Section
Note: There are no undo or revision options available for this method so use with caution.
Occasionally you may need to replace an image you have uploaded previously, such as if a logo has changed.
Replacing an image globally in Drupal version 8/9+
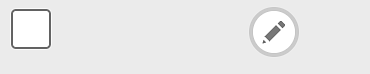
Go to the Media section of your site by clicking Content and then the Media tab. Find the image you need to replace and click the pencil icon at the top right of the image:
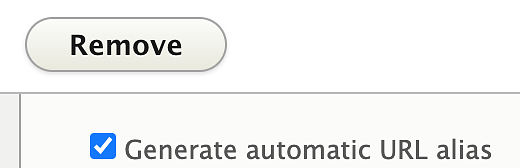
Scroll down until you see the "Remove" button just below the crop options for that image:
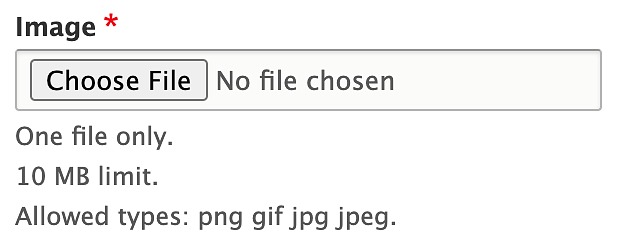
Then insert your image using the "Choose file" inserter as if you were inserting the image for the first time:
Fill out the Alt text for the image and then scroll to the bottom of the page and click the "Save" button to update your image on all of your content.

Note: There are no undo or revision options available for this replacement method so make sure any file you are replacing has been backed up before you choose this replacement option.
Edit Image Properties
Note: This feature is not currently available in the most recent version of Drupal.
To adjust the properties of a photo you can click the left-hand image icon in the Content Editor box:

Or, you can right-click on the image, then select the Images Properties option:

From the Image Properties pop-up box you can change the image size, padding, and alignment.
- To adjust the size of the photo, click on the Width field and type in the pixel width you want the photo to appear.
- To the right of the Width and Height boxes is a lock (
- ). When it is locked (right lock icon), the height will adjust automatically in proportion to any change in the width.
Note: If the lock is unlocked, the width will adjust independently of the height and can cause the image to be distorted. - If you need to reset the image size, click on the circle with an arrow (
- ) located to the right of the lock.
- Padding (HSpace and VSpace) adds extra space around the images so that the text and other items are not touching or too close to an image.
- 8 is a commonly used number for the HSpace, but anything between 5–10 px (pixels) will work for the HSpace, although some situations may need more or less, depending on the content.
- 8 is also a commonly used number for the VSpace, but again, anything between 5–10 px will work, although on rare occasions you may find it necessary to use 0-2 px for the VSpace.
- The last Image Property option is Alignment. Alignment allows you to wrap the text and other objects around the photo and have the image aligned to the left or right of the page.
- If you'd like the image to stand alone (not included with paragraph text), leave the alignment to the default setting of <not set>.
- If you'd like the image to align left or right with the text wrapping around it, choose either left or right from the Alignment drop-down.
Note: Make sure that the image is at the very beginning of your paragraph to ensure that it will allow the text to wrap properly. - Click the OK button to commit the changes.
Visit the Photo Tools page for more information about how to format and resize images.
Upload Multiple Images
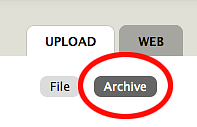
On the Add File page, click the Archive link located at the top right of the page under the UPLOAD tab.
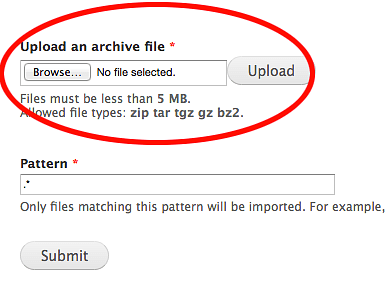
- Click on the Browse button and find the compressed file folder that you want to add to your site.
Note: The only compressed file formats that can currently be uploaded are .zip, .tar, . tgz, .gz, and .bz2. - The best practice is to only have just the files you want to upload in your compressed file. Although, should you need to single out a specific type of file to upload you can do so in the Pattern text field box. Type .* followed by the file type you want to batch upload. .*jpg for example, would cause only the jpg images to be batch uploaded. However, it is strongly recommended that your compressed folder contain only the files you want to batch upload as it will make the process much easier for you.
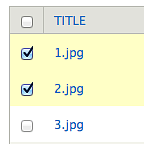
- After clicking the Submit button on the Archive upload page, it will process your compressed folder file and upload it to your site. It will automatically take you to the main Content page and a green banner will appear at the top of the page with a successful upload message. In the example below the message is: Extracted test-zip.zip and added 3 new files.

Change Multiple Images
- Occasionally you may need to make updates to several images at the same time.
From the Files page, you can check the boxes to the left of the images that need updating.
- Select the relevant choice from the UPDATE OPTIONS dropdown menu.
The most commonly used choice is the Delete selected files option which will, as it states, delete the files.
Note: There is no undo button for these updates so make sure you really want to choose that update option.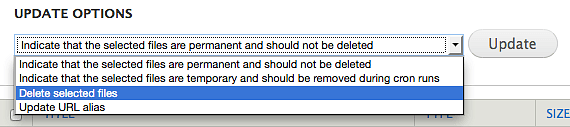
- You are very unlikely to use any of the other three options, and unless you know what you are doing, it is not recommended to use them.