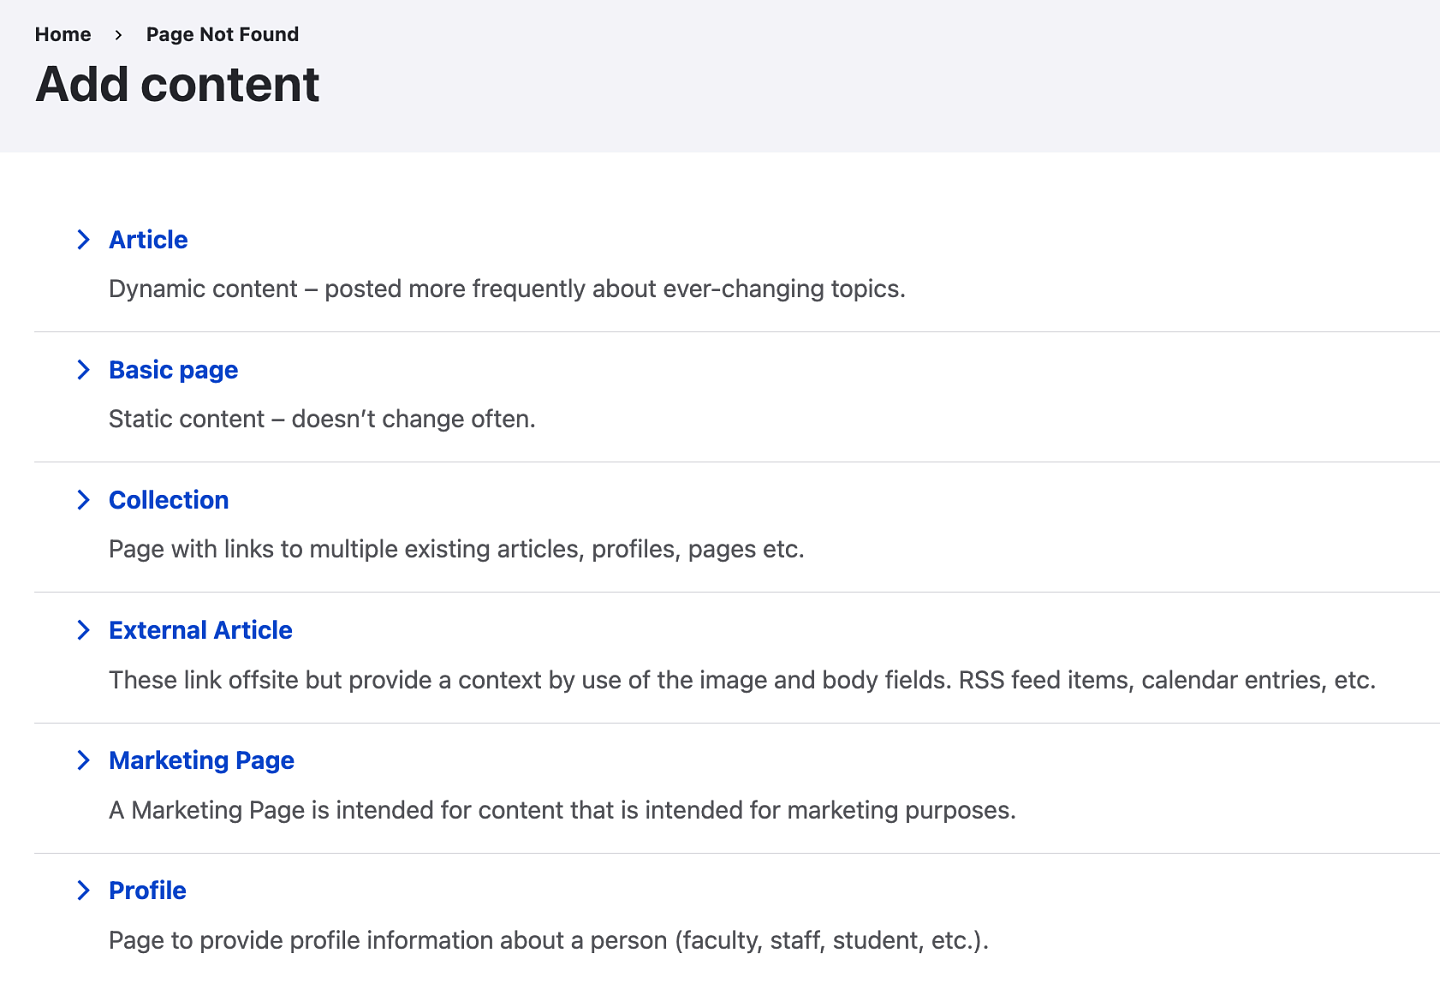
To create a Marketing Page, click on Add content in the top Shortcuts menu and then select the Marketing Page content type.

Provide the Marketing Page Content
When setting up a Marketing Page, you will need to complete the title and add body copy to the page just like when creating a Basic Page. When adding a Marketing Page there are a few key differences:
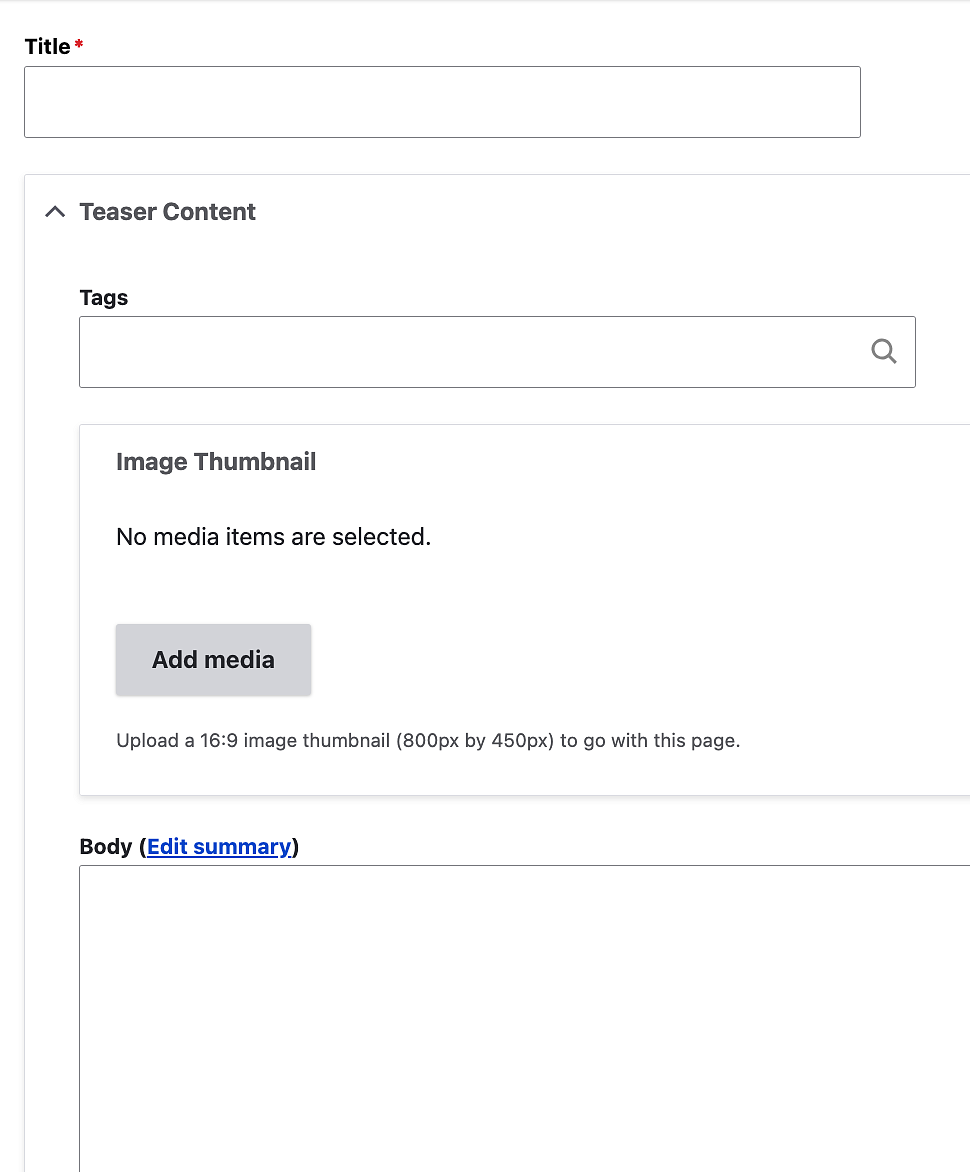
- Title: Like a Basic page, the Title will be the text seen in places such as a web search, when used in dynamic content, or when looking at Google Analytics.
Note: Unlike on other content types, the text used for the Title is not seen on the actual Marketing Page, although it will be seen if your page is shared externally and in web searches. To add a visual title to a Marketing Page, you'll need to add your H1 title somewhere in your first envelope as this will be your visible Title. - Teaser Content, Image Thumbnail: The Image Thumbnail acts as the preview image for your Marketing Page and is found in the Teaser Content section. You will click the Teaser Content, then click the Add media button to choose your image. Teaser image thumbnails should be 16:9, with a recommended size of 800px x 450px. Always include an image for your Teaser content, otherwise you could have no image, or an image that does not represent your page's content.
Teaser Content, Body and Summary: The Body and Summary are found in the Teaser Content section. You will click the Teaser Content, then type in your teaser text into the Body section or the summary section. Text in the Body and Summary part of the Teaser Content section is different from the normal Envelope Body sections as the text will not appear on the page but will appear if used in a news feed (example: Oregon In the News) or if shared somewhere, such as on social media.
Notes: Teaser sections need to have the thumbnail image and body/summary added before publishing, otherwise you may have text or image issues when your Marketing Page is viewed in a web search, displayed in a dynamic feed, or shared on social media due to caching.
If you leave the Teaser image or Body area blank, it will use an image from the page and a default trimmed-down version of the full text of the first envelope as the preview text, either of which may not represent your page's content in the best way when your Marketing Page is used in dynamic content or shared somewhere. An ideal Teaser Body section should be 1-3 short sentences about the information on the page.

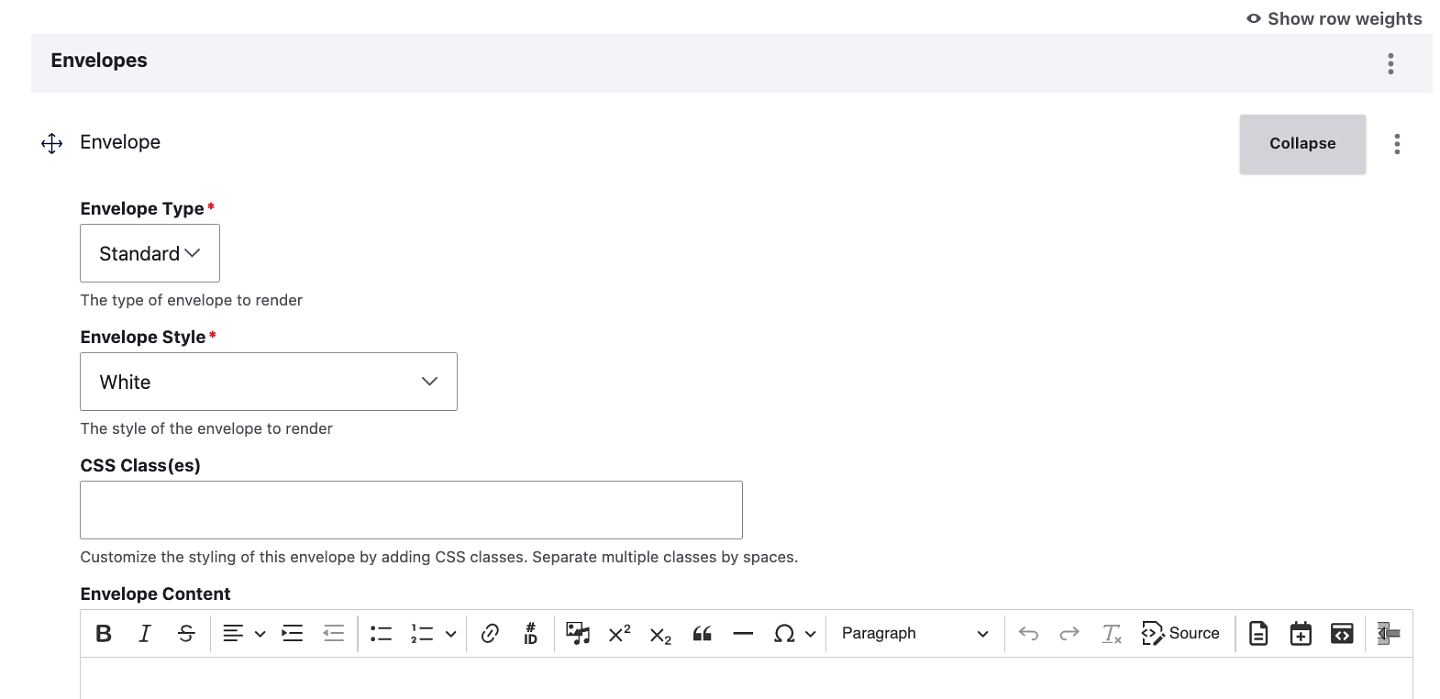
Envelopes: Envelopes are the content areas of your Marketing Page. Each Envelope is separate from any other Envelope in a Marketing page and each one can use the same or different settings.
Note: Envelopes are different than the template item Envelopes, but you can use an Envelope template inside of a Marketing Page Envelope if desired.
Each envelope has four pieces:
Envelope Type: This determines the spacing between envelopes, as well as the left and right margins of your Envelope. There are three types:
- Standard: This is the default Type and the Type you will use the most often as it has the most accessible page layout, with abundant padding around all sides.
- Narrow: This Type has less padding than the Standard Type and wider left and right margins so you will need to place all of your text content inside of a template that will give your text a smaller width for accessibility, such as a Longform layout.
- Flush: This Type has no padding and no left or right margins so like the Standard Type, you will need to place all of your text content inside of a template that will give your text a smaller width for accessibility, such as a Longform layout.
Envelope Style: Envelope Styles determine the background and text colors of your Envelope. There are several Style options:
- White: This is the default Style for Envelopes. The background will be white and your Envelope's text will be dark colored.
- Black: Envelopes using this Style will have a black background and your Envelope's text will be light colored.
- UO Yellow: Envelopes using this Style will have a UO Yellow background and your Envelope's text will be dark colored.
- UO Green: Envelopes using this Style will have a UO Green background and your Envelope's text will be light colored.
- Custom Background (Dark): Envelopes using this Style will need to have an image uploaded to your Envelope, located at the bottom of that Envelope's section, below the Body area, and your Envelope's text will be light colored. If you do not upload an image, your Envelope will have a black background.
- Custom Background (Light): Envelopes using this Style will need to have an image uploaded to your Envelope, located at the bottom of that Envelope's section, below the Body area, and your Envelope's text will be dark colored. If you do not upload an image, your Envelope will have a white background.
- Custom Background Parallax (Dark)*: Envelopes using this Style will need to have an image uploaded to your Envelope, located at the bottom of that Envelope's section, below the Body area, and your Envelope's text will be light colored. The "Parallax" style means your uploaded background image will remain fixed in place while the contents of your Envelope scrolls. If you do not upload an image, your Envelope will have a dark background.
- Custom Background Parallax (Light)*: Envelopes using this Style will need to have an image uploaded to your Envelope, located at the bottom of that Envelope's section, below the Body area, and your Envelope's text will be dark colored. The "Parallax" style means your uploaded background image will remain fixed in place while the contents of your Envelope scrolls. If you do not upload an image, your Envelope will have a white background.
- * Important: Use parallax sparingly and when it meaningfully enhances the user experience, rather than as a default design feature. Too much parallax and motion can be harmful for those with cognitive or vestibular impairments.
CSS Class(es): This box is where you can add our Drupal CSS classes to your Envelopes. Any CSS added to this box will apply to your entire Envelope. An example of CSS you might add would be to add one of our other background colors and patterns. If you wanted a "Berry" background color, with a "Waves" pattern, you would just need to add the text: palette-bg-berry bg-pattern-waves to the CSS text box.
Envelope Content: This is where you will add all of the content for your Envelopes. Each Envelope is separate from each other.
Envelopes also include a few other differences from other content types as you have a several additional actions you can do with each Envelope:
- Add: This will add a new, blank Envelope with the default the Standard Envelope Type and White Envelope Style. The new Envelope will be at the bottom of all of your other Envelopes.
- Remove: This will delete that entire Envelope and its contents.
- Duplicate: This will clone an existing Envelope. The cloned Envelope will be added directly below whichever Envelope was duplicated.
- Collapse: This will collapse your Envelope into a single horizontal bar, which means it cannot be edited. This can be helpful if you have a lot of Envelopes if you don't want to scroll as far, or if you want to prevent accidentally editing the wrong envelope. It can also be helpful when moving Envelopes as all the envelopes will take up a much smaller area. Collapsed Envelopes will show an abbreviated list of that Envelope's contents in the Envelope bar.
- Expand: This will expand an Envelope that you have collapsed so that you can edit that Envelope's content again.
- Move: Using the arrows located to the left of the Envelope item will allow you to move an Envelope. Click on an arrow icon and drag it up or down to move it to a new location. You can also click on the "Row weights" link located at the top of your Envelope list on the right side and then use the numbers that have appeared on the right side to rearrange your Envelopes.

