NOTE: This platform is maintained by UO Information Services, not University Communications. More information, including help articles and support, can be found on the UO Blogs website.
Logging Into the OPURP WordPress Site
- Go to https://blogs.uoregon.edu/opurp/wp-admin.
- Click the “Use My Duck ID” button and enter your Duck ID and password.
Once logged in, you can reach the Dashboard menu by clicking the website name in the upper left corner, or clicking on Dashboard in the dropdown menu that appears when you hover over the website name.
The Dashboard is the centralized control panel where administrators can manage and customize the site's content and settings.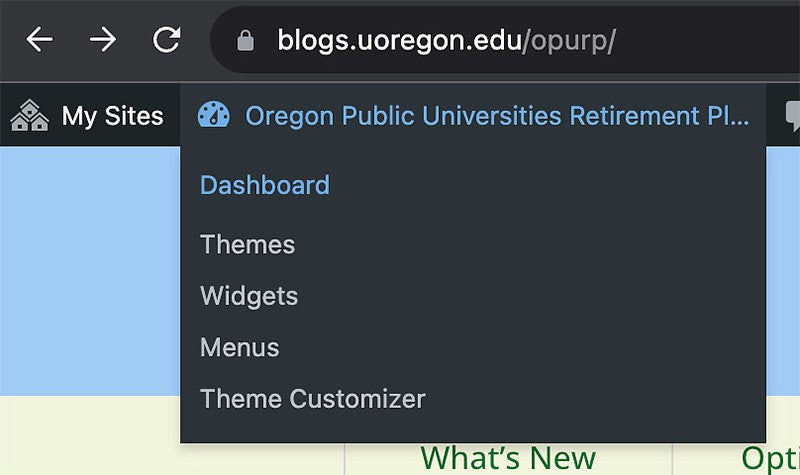
Editing an Existing Page
Enter Editing Mode
While logged in, use your site’s navigation to go to the page you would like to edit, or type the page URL into your browser.
Click Edit Page in the black menu bar at the top of the page.
You can also locate the page you would like to edit from the Dashboard.
- In the Dashboard menu on the left, click Pages to see a list of pages on your site.
You will see buttons above and below the list that you can click to see additional pages.

You can speed up your search by typing a keyword into the search field in the upper right. WordPress will show a list of pages that contain the keyword in the headline or body of the page.

Hover over the page name in the Pages list to see these options: Edit | Quick Edit | Trash | View
Click Edit to begin editing the page.
- In the Dashboard menu on the left, click Pages to see a list of pages on your site.
Page Editing Tips
Using the Web Editor
Once you are in edit mode, you will see the editing toolbar followed by the page content.
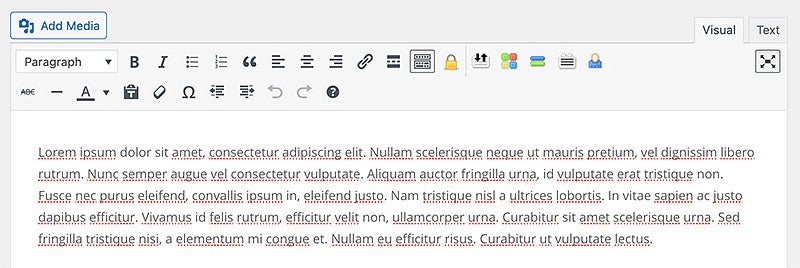
Most tools in the editing toolbar function as they do in Microsoft Word and similar word processing programs. Here are a few notes about features specific to using the web editor:
Section Headings:
Click on the word “Paragraph” in the upper left of the menu to select a heading style for each section heading on your page. Section headings provide a clear hierarchy of information on a page, which is important for accessibility. Headings also provide visual consistency across the site and help search engines index your website content.
Use H2 for your first section heading, and then use H3 and then H4 for sub-sections as you would with an outline. (The page title will automatically be assigned the H1 style.) Repeat this process with additional sections on your page.
H2 – First main idea
H3 – Subtopic
H4 – Supporting informationH2 – Second main idea
H3 – Subtopic
H4 – Supporting informationHyperlinks:
Use the link icon to create hyperlinks as you would in Word.
Internal Links: If you are linking to another page inside your website, use a “relative link”—only include the text that comes after your site domain.
For example, if linking to an About Us page on a site at https://examplesitedomain.edu/about-us, the relative link would be: /about-us
- External Links: When linking to a page outside your website, use the full URL including https://
Visual vs Text Editor:
You can toggle between the Visual Editor and the Text Editor by clicking on the Visual and Text tabs in the upper right. While the Visual Editor allows users to format content visually, the Text editor provides access to the HTML code for more advanced customization.
Linking to a PDF
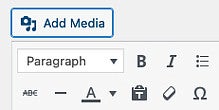
To add a link to a PDF while editing a page:
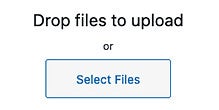
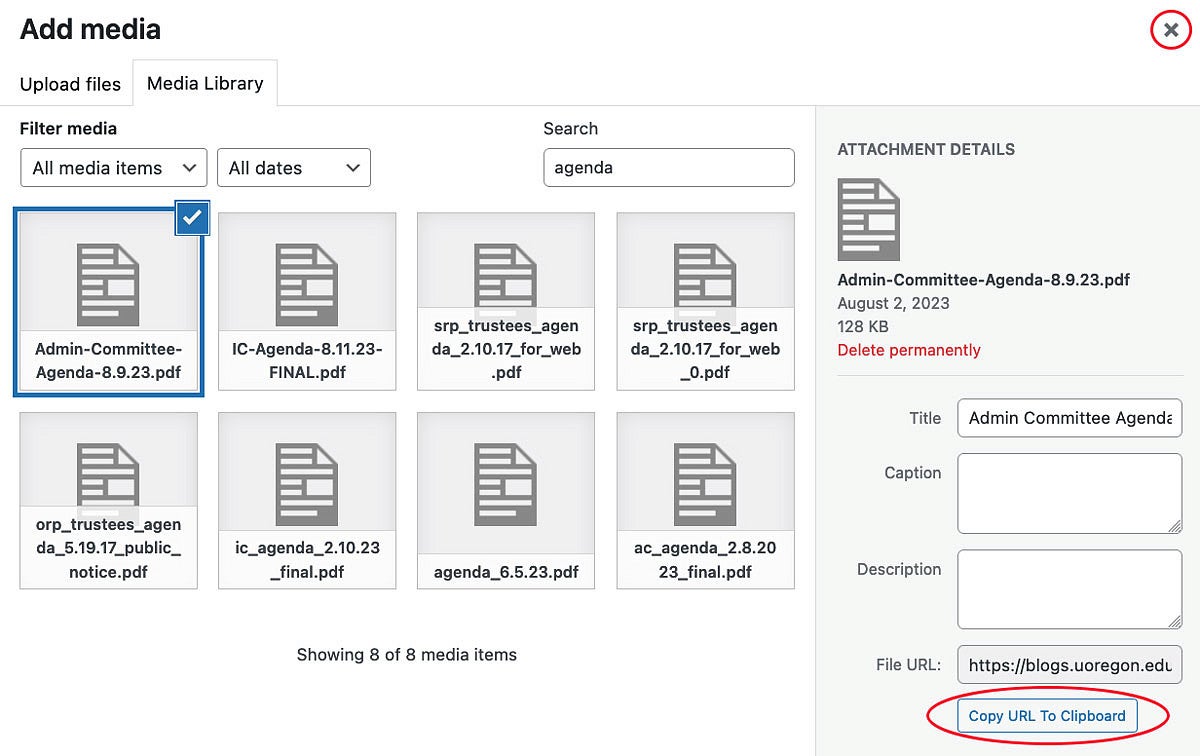
Click on the Add Media button above the editor toolbar, then click the Upload Files tab at the top of the page. Drag and drop your file or click the Select Files button and browse to your file.

Once the file has been uploaded, click on the Copy URL to Clipboard button on the right. Click on the X in the upper right corner to close the Media window.
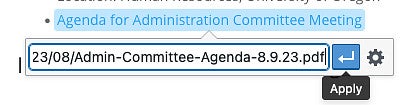
Highlight the text you want to place the link on, and then click the Insert/Edit Link icon in the editor toolbar. Paste the URL you copied to your clipboard into the dialog box and click the Apply button.

Saving Your Work
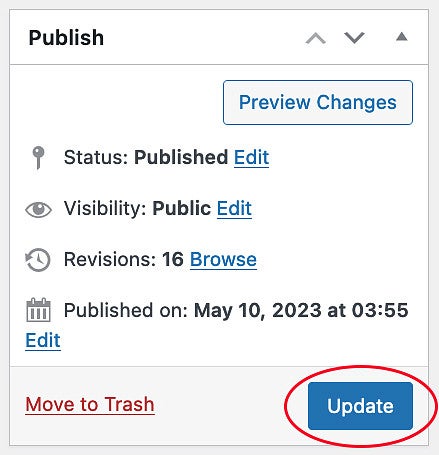
Be sure to click the blue Update button on the right when you are finished with your page edits.
Restoring/Viewing a Previous Version of the Page
You can look at the revision history of a page and restore an earlier version if needed.
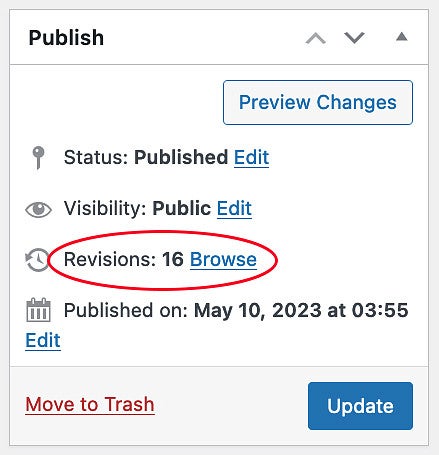
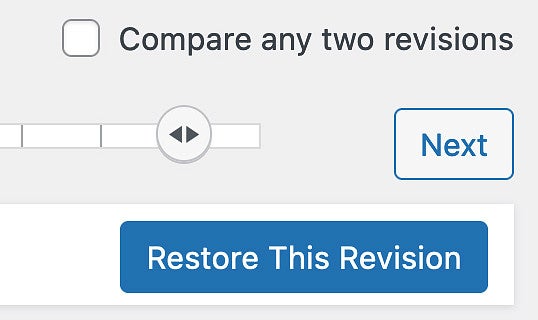
Click the Browse link next to "Revisions" on the right side of the page.
Drag the slider at the top of the page or use the Previous and Next buttons to look at various revisions. You can also compare revisions by clicking the checkbox next to "Compare any two revisions".
Click the blue Restore This Revision button to publish an earlier version of the page.
To exit Revisions without restoring a revision, click the linked page title in the upper left, or click the "Go to editor" link. In the screenshot below, "Meetings" is the clickable page title.

A Note About the Divi Builder
While in editing mode, you will see a purple button at the top of the page that says "Use the Divi Builder". The pages on the OPURP site are built using the Standard Editor. You will not need to use the Divi Builder. The Divi Builder is sometimes used with page layouts that include columns and images.
Creating a New Top-Level Page
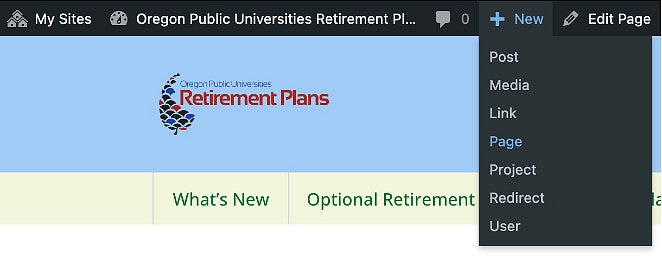
To create a new page like What’s New, which appears in the top-level navigation:
Click New > Page in the admin bar at the top of the site:
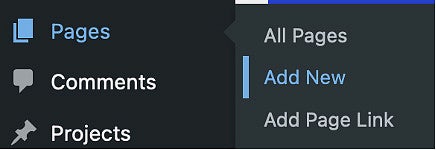
OR click Pages > Add New in the Dashboard menu:
Add your content to the page and click the blue Publish button on the right side of the page. You can change the Visibility from Public to Private in the upper right corner if you are working on a draft.
Add this New Page to the Top-Level Menu
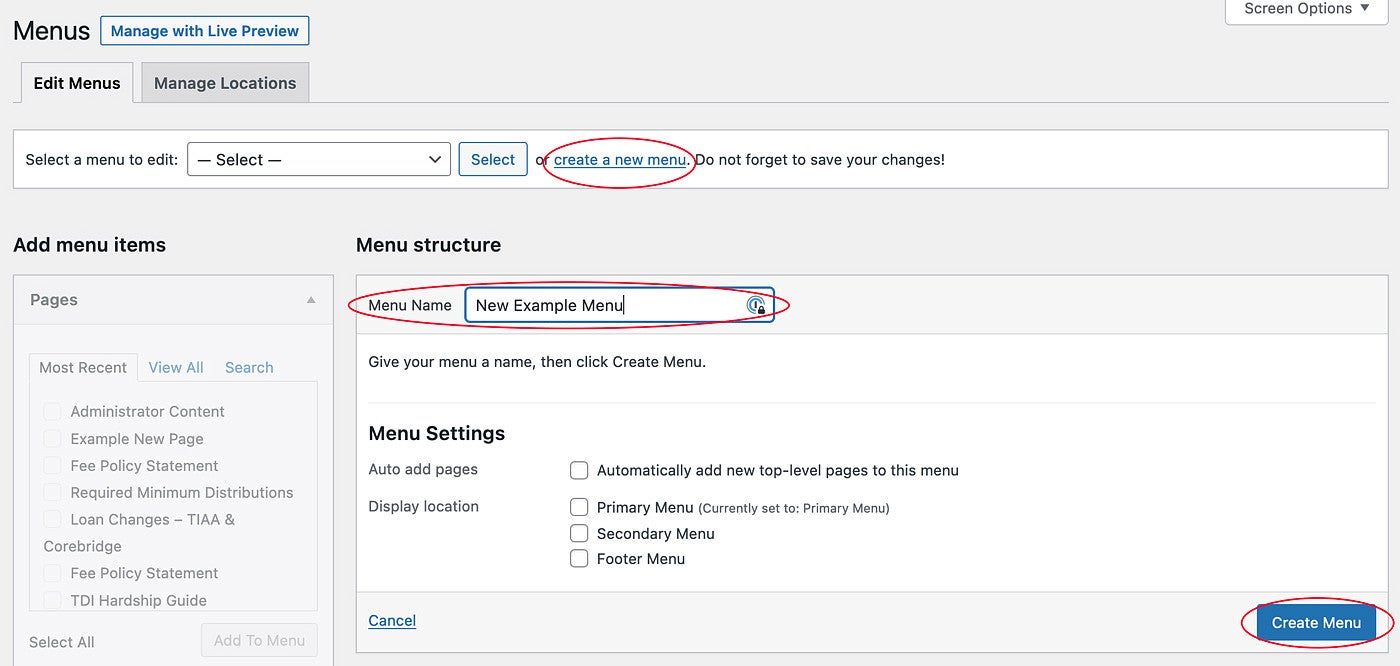
You can add the page to the top-level navigation following the steps below.
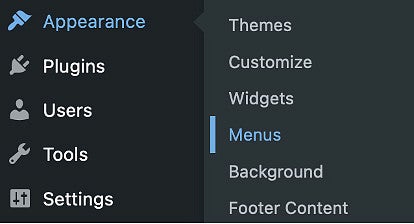
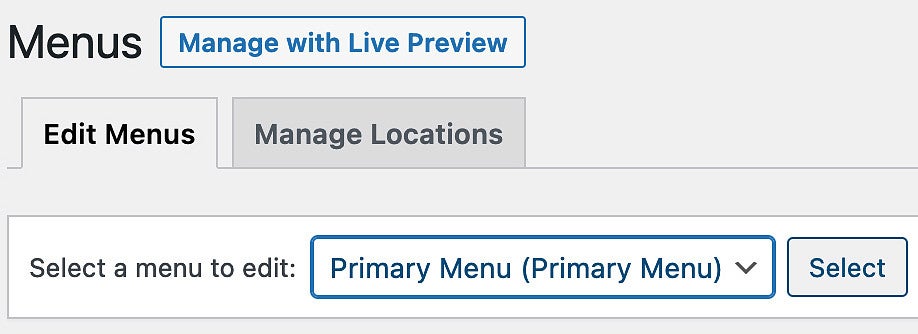
Click Appearance > Menus in the Dashboard menu on the left.
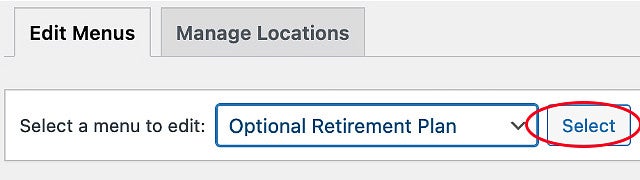
Select the Primary Menu from the dropdown list near the top of the page, then click the Select button.
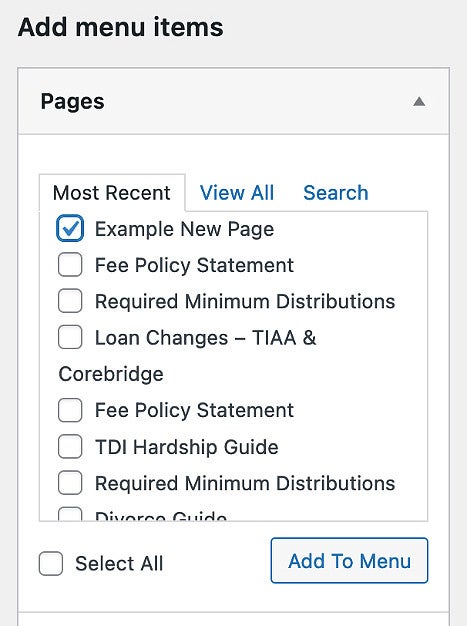
Locate the page you created in the Pages list on the left side and click the checkbox to select it. Next, click the Add to Menu button.
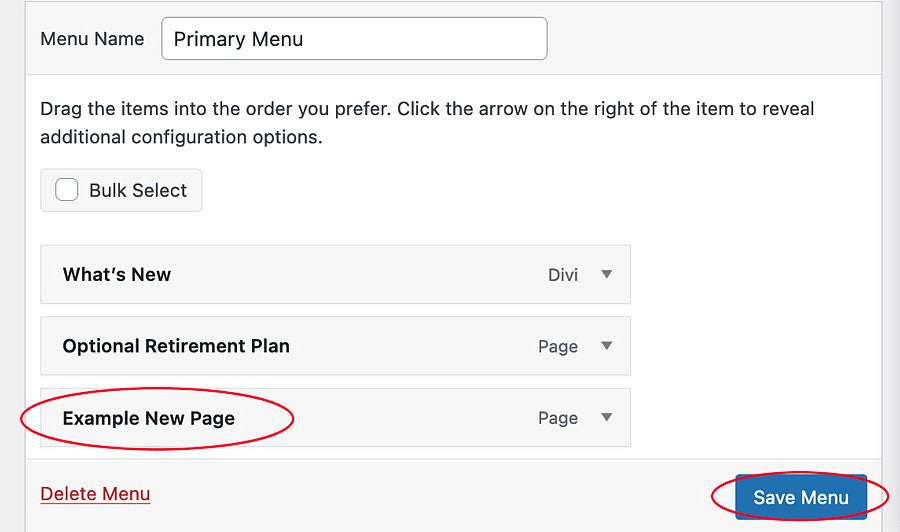
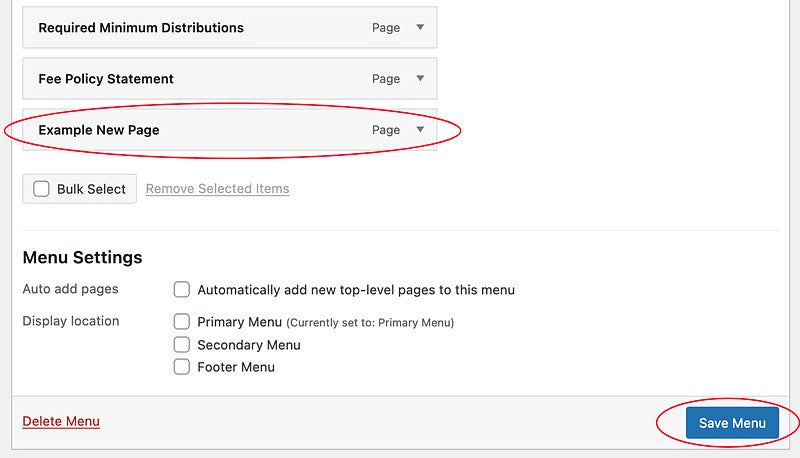
Your page will appear on the list in the middle of the page. Click and drag it to the desired position in the menu, then click the blue Save Menu button in the lower right corner of the page.
Creating a New Subpage
Click New > Page in the admin bar at the top of the site:
OR click Pages > Add New in the Dashboard menu:
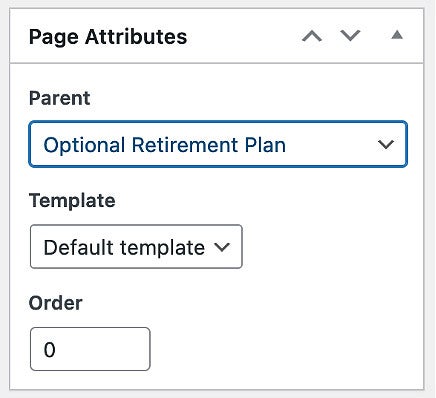
Select the parent of the page in the Page Attributes menu on the right side of the new page. For example, the parent page may be Optional Retirement Plan. Leave the Template on the “Default template” setting and leave the Order at 0.
Add your content to the page and click the blue Publish button on the right side of the page. You can change the Visibility from Public to Private in the upper right corner if you are working on a draft.
Add this Subpage to the Menu
Click Appearance > Menus in the Dashboard menu on the left.
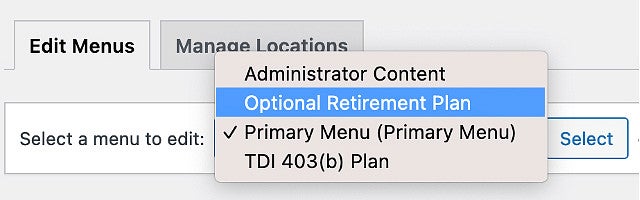
To add the page to an existing menu, select the menu from the drop-down list near the top of the page, then click the Select button.
You would create a new menu if you are adding subpages to a page that does not already have subpages, such as the What's New page. If you were adding a menu to the What's New page, you would name the menu "What's New".
Locate the page you created in the Pages list on the left side and click the checkbox to select it. Then click the Add to Menu button.
Your page will appear on the list in the middle of the page. Click and drag it to the desired position in the menu. Click the blue Save Menu button in the lower right corner of the page.
Adding a Secondary Navigation to an Existing Top-Level Page
To add a secondary navigation to an existing page so that it functions like the TDI 403(B) Plan page:
- First, follow the steps above to create at least one subpage that will appear in the new secondary navigation and add the subpage(s) to a new menu.
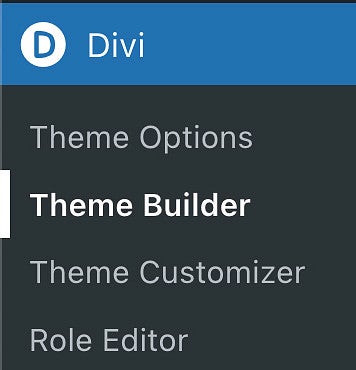
Next, click on Divi > Theme Builder in the lower portion of the Dashboard menu.
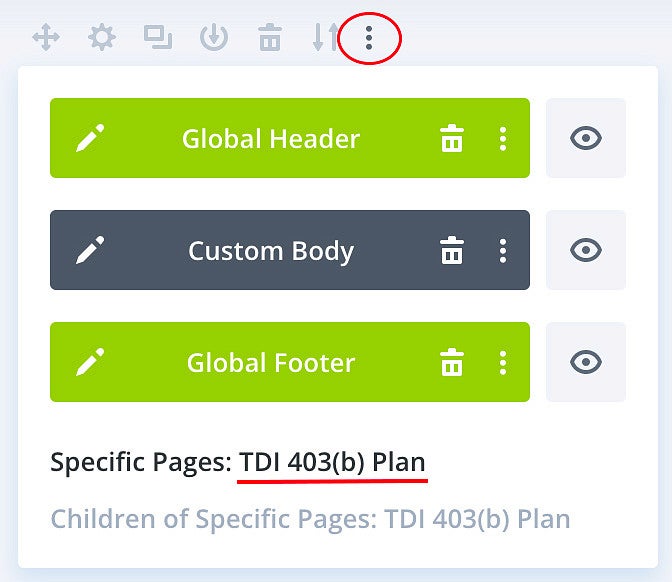
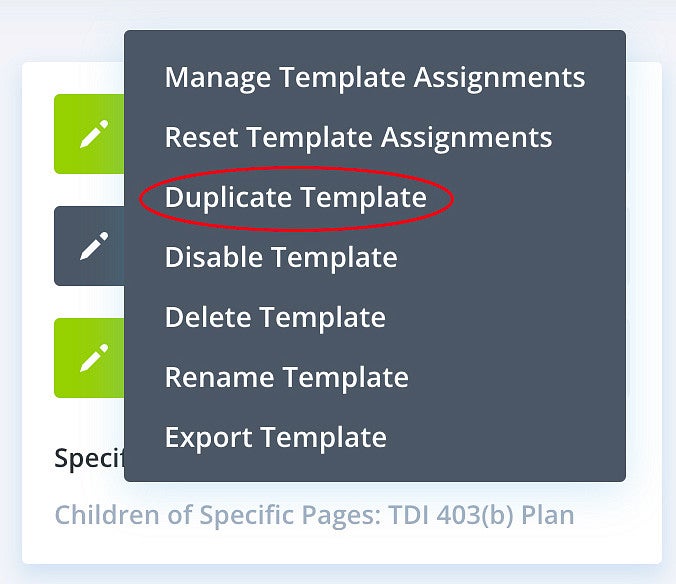
To create this secondary navigation, you will clone an existing template. Hover over the template you would like to clone, for example the TDI 403(b) template, and menu icons will appear above the template. Click on the three vertical dots, then click Duplicate Template.
A pop-up menu will open. Hover over "Specific Pages" and click in the checkbox next to the page that will be the parent page. In this example, the parent page is Example New Page.
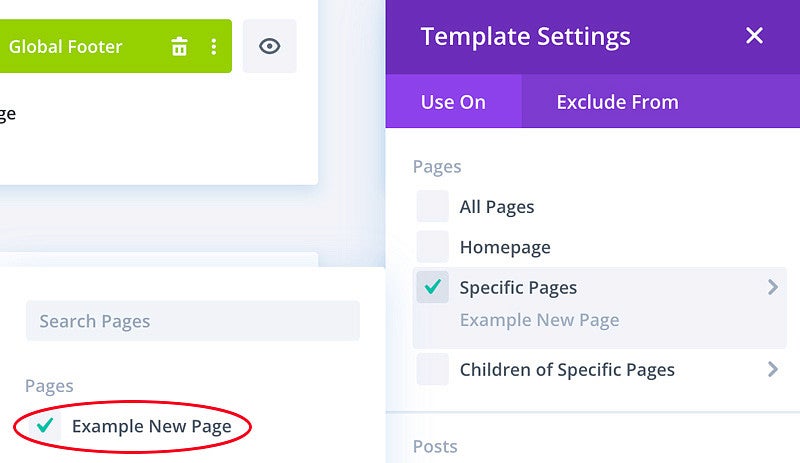
Click on "Children of Specific Pages" and select the same page. In this example, the page is Example New Page.
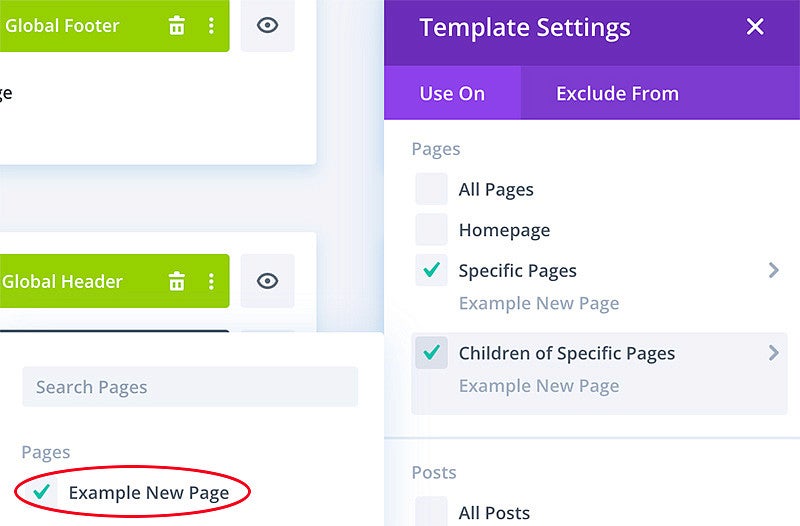
Click the blue Save button at the lower right.
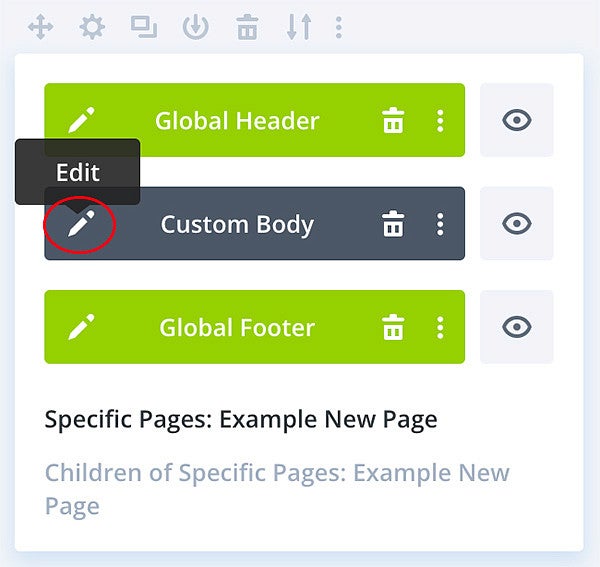
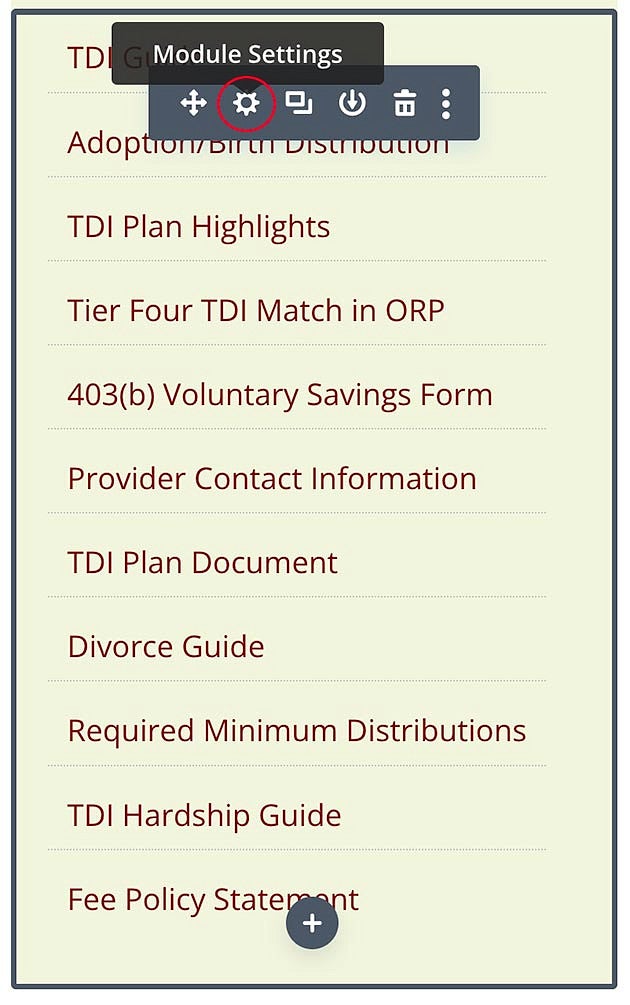
Click the pencil icon next to "Custom Body" to edit the template. Mouse over the text at the top of the left-hand menu and a grey outline will appear. Click the gear icon in the grey bar to edit the module menu title (this is the top-level "parent page" above the subpages).
Change the text to the name of the top-level parent page. In this example, the parent page is Example New Page. The text format for this menu heading is all caps.
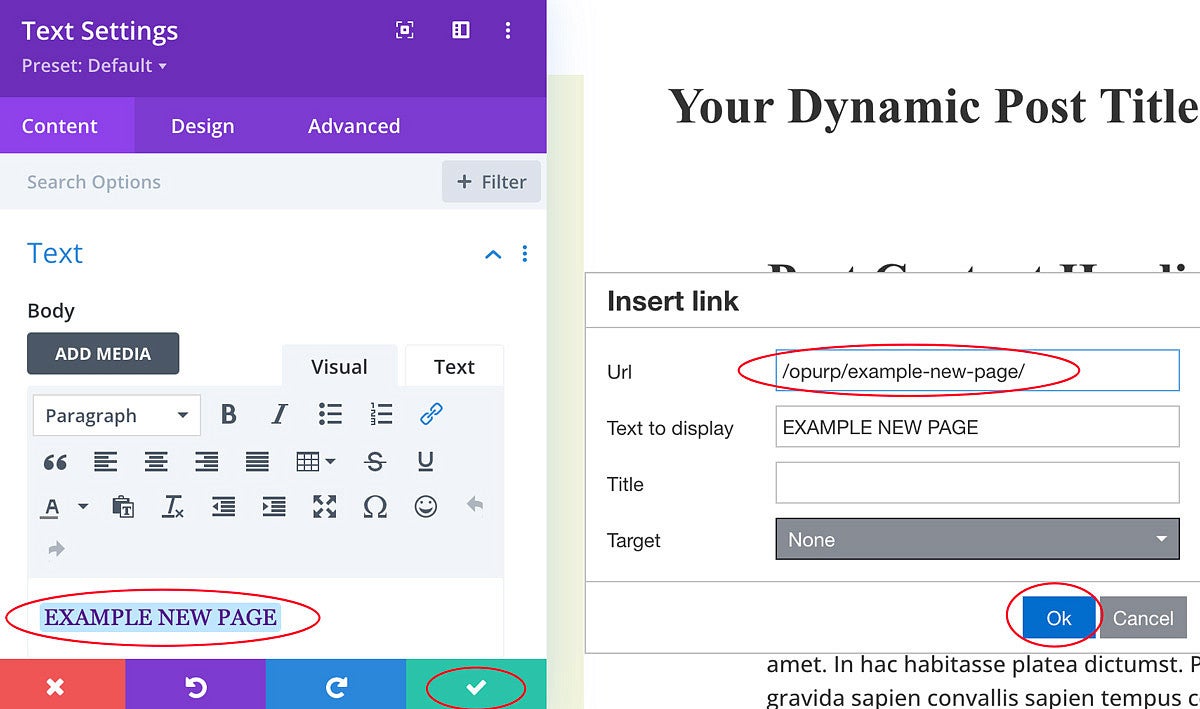
Change the link to point to the correct top-level parent page by clicking the link icon, pasting in the new relative link (for example "/opurp/new-example-page"), and clicking OK. Then click the green check mark button to save.
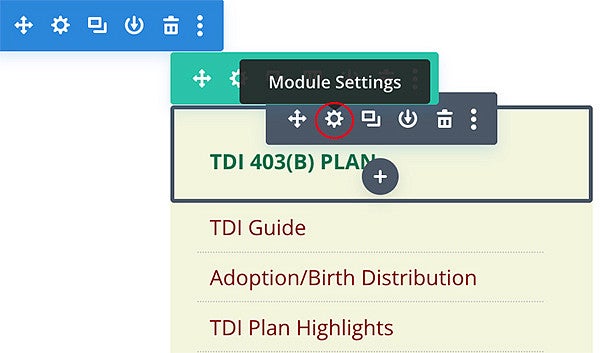
To change to the correct submenu, hover over the submenu underneath the menu title you just edited, and click the gear to edit the module. Select the correct menu from the Menu dropdown list and click the green check mark button to save.

- You do not need to edit the sections on the right side of the page.
- Save Your Work: Click the X in the upper right corner, then click the Save & Exit button. You will return to the Divi Theme Builder page. Make sure the green button in the upper left says "All Changes Saved". If it says "Save Changes", click the button.
- You should not need to edit the Divi template again once it is set up. Follow the steps described above to add additional subpages to your new secondary navigation.